
PF Tek: A Step-by-Step Beginner's Guide
Exploring the world of mycology can seem intimidating, especially considering the multitude of technical terms and intricate procedures found online. However, growing mushrooms doesn't have to be complicated. Beginners can get started easily, using simple techniques and minimal equipment to achieve satisfying results.
What is the PF Tek Method?
One of the methods suitable for beginners is the PF Tek method, which stands for "Psilocybe fanatics technique".
Developed by Professor Robert McPherson in 1991, the PF Tek offers an accessible way to grow mushrooms at home without requiring specialized equipment.
While it may not produce the highest quantities, PF Tek remains popular among Psilocybe enthusiasts and is suitable for gourmet mushrooms growing on grain substrates.
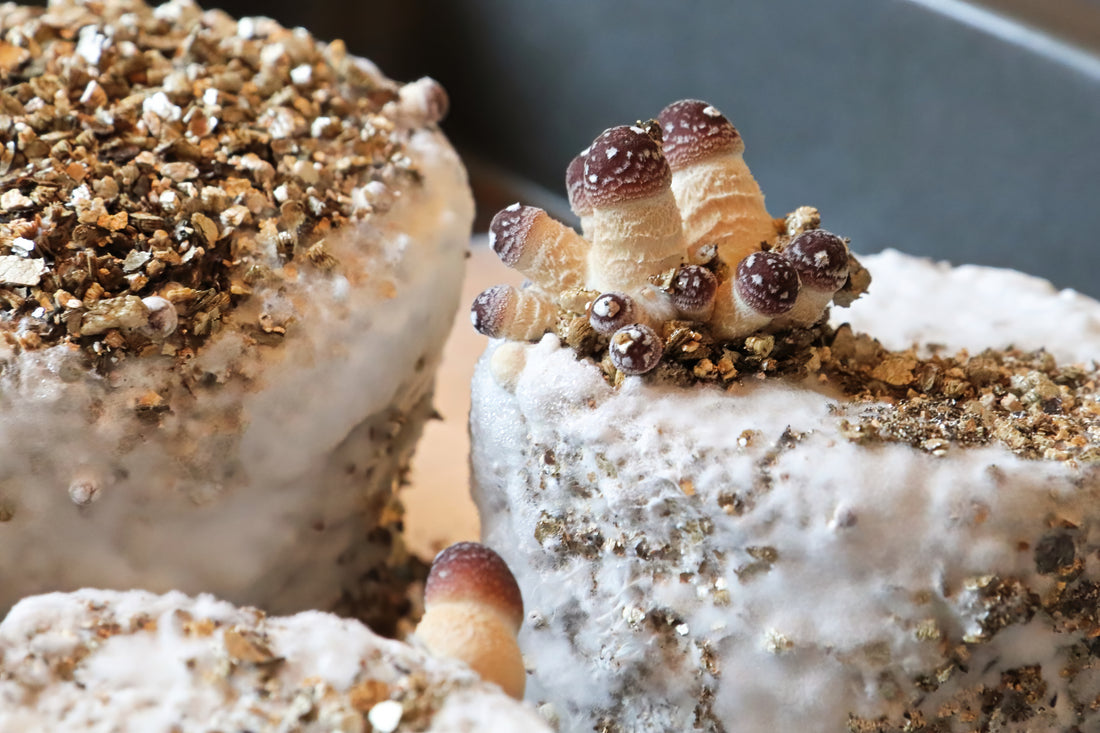
The PF Tek method is based on the creation of small fruiting blocks called BRF (Brown Rice Flour) cakes, using a mixture of vermiculite and brown rice flour.
This technique allows novice growers to explore the mushroom life cycle, understand their growth requirements, and master substrate sterilization while keeping costs low.
What are the growth times using PF Tek?
The time it takes to grow mushrooms using the PF Tek method varies depending on the type of mushrooms you are growing and the conditions you provide.
Some mushroom species grow much faster than others.
But in general, you can work over a period of about 6 weeks. This includes 2-4 weeks for the mycelium to fully colonize the substrate and another 1-3 weeks for the mushrooms to grow.
How to Grow Mushrooms with PF Tek Step by Step
Below, we'll walk you through the PF Tek process step by step, from substrate preparation to fruiting:
Step 1: Gathering Materials
Before diving, gather all the necessary materials:
A syringe containing mushroom spores or liquid culture
The PF tek requires a liquid inoculum, you will inject a spore solution or mycelium in liquid culture into the substrate.
You can purchase spore syringes or liquid culture online. We recommend purchasing spores or cultures from reputable manufacturers.
You can also make your own spore syringes from a spore print.

Substrate ingredients
Heat-resistant containers with modified lids
To grow mushrooms with the PF Tek you need heat-resistant containers, preferably with lids.
The containers must have an opening wider than the base so that the cakes can be easily removed without having to break them once they have colonized.
We recommend using small jars (220ml) to speed up colonization times and reduce the risk of contamination. Wide-mouth glass canning jars are an excellent choice, easy to find, reusable, and inexpensive.
The lids of your jars must have holes to allow for inoculation and air exchange during colonization.
You can purchase caps already modified with a filter and injection port . Otherwise, simply drill four small holes near the edges of the cap.

Household Tools
One of the reasons that makes the PF tek ideal for beginners is that many of the tools needed are ordinary household items such as:
- A hammer and small nails to make the holes in the cap
- A bowl and a spoon to prepare the substrate
- Aluminum foil to cover the caps during sterilization
- A large regular or pressure cooker for sterilizing
- A metal rack or metal jar lids to place at the bottom of the pot to prevent the jars from coming into direct contact with the bottom
- A lighter to sterilize the needle
Step 2: Preparing the Substrate
Once you have all your materials, the next step is to prepare the substrate. PF Tek uses a substrate mix of 2 parts vermiculite, 1 part water, and 1 part brown rice flour.
Measure the vermiculite, brown rice flour, and water for the number of jars you want to fill. An easy way to do this is to use your own jars.
For example, if you plan to fill 6 jars with substrate, to make 6 BRF cakes, you will need 4 jars of vermiculite, 2 jars of water, and 2 jars of brown rice flour.
This measuring method is not precise and you may have some leftovers.
Place your vermiculite in a bowl and slowly add water, stirring with a spoon to ensure all of the vermiculite is wet.
Before adding brown rice flour, it's best to check that you have the correct amount of moisture.
To do this, tilt the bowl. If a few drops of water leak out of the vermiculite, it has the right amount of moisture.
But if there is a lot of water, you will need to put the vermiculite in a colander and let it drain for a minute.
Once you are satisfied with the moisture content, add the brown rice flour and mix the mixture well until each piece of vermiculite is evenly coated with flour.
Step 3: Fill the Jars with Substrate
Once your substrate is well mixed, it's time to fill the jars.
Place the substrate loosely into the jars, leaving about 1 cm of space at the top.
Don't compact the substrate. It's important to keep it light and airy, so as to provide air pockets for the mycelium during colonization.
Make sure the top of the pot, above the substrate, is clean. If necessary, use a clean cloth to remove any moisture or substrate residue from both inside and outside the rim of the pot.
Once the top of the pot is clean and dry, fill the space by 1 cm with dry vermiculite. Dry vermiculite forms a barrier between the substrate and the air, helping to prevent any contamination.
Finally, close the jars with their lids and cover them with foil to prevent water from penetrating through the holes during sterilization.
Step 4: Sterilizing the substrate jars
To ensure adequate sterilization of the substrate, temperatures above 121°C must be reached for at least 2 hours.
Most small-scale mushroom growers use a pressure cooker to sterilize jars at 15 PSI (1 bar) for 45 minutes.
However, since PF Tek's goal is to make mushroom growing accessible and inexpensive for beginners, they use brown rice flour, which allows them to use a large pot with a lid to steam the jars for an hour and a half.
While this procedure does not guarantee complete sterilization but rather high-temperature pasteurization, it reduces the number of competent organisms in the substrate, providing an initial advantage to the mycelium.
For this method, pour about an inch of water into the bottom of a pot and place a rack or similar to keep the jars above the water.
Place the jars on the rack and bring the water to a boil until it begins to evaporate. This determines the cooking time. Check the pot and add water if necessary to prevent it from drying out.
If you substitute brown rice flour with flour from another type of grain, you will need to use a pressure cooker for sterilization.
After sterilizing, leave the jars in the saucepan or pressure cooker to cool.
Step 5: Inoculation
Inoculation is the process of adding spores or a liquid culture to the substrate. Make sure your spores or liquid culture are of good quality and free from contaminants.
In the PF Tek method, a syringe with a sterilized needle is used to inject the spores or culture into the substrate contained in the jars.
This is a critical step in mushroom cultivation, as there is a risk of introducing contaminants. Therefore, it is essential to take all possible precautions to minimize this risk.
Mushroom growers typically inoculate substrates in controlled environments, such as in front of a laminar flow hood. However, beginners can also use a glove box, a SAB, or simply a well-cleaned room, such as a bathroom.
Once you have prepared a clean work environment, it is important to ensure that the jars have cooled to room temperature, as a substrate that is too hot could compromise the viability of the mushroom spores or mycelium.
After removing the jars from the stockpot or pressure cooker, place them on a clean surface and carefully remove the aluminum foil from the tops of the jars.
Before inoculating, gently shake the syringe to evenly distribute the spores or mycelium in the liquid. Then, carefully sterilize the syringe needle over a flame until it glows.
Let the needle cool slightly and then gently insert it into one of the holes in the jar lid, tilting it slightly so that the tip gently touches the inside glass.
Next, carefully inject an appropriate amount of the solution (0.25 - 0.5 ml) into each hole in the jar lid, being careful to observe the liquid flowing along the inside walls of the glass.
Placing the inoculum solution near the glass makes it easier to observe the mycelium during the growth phase, allowing you to carefully monitor the colonization process.
After completing the inoculation, carefully cover the lid holes with breathable microporous tape, so as to allow adequate air exchange during the colonization phase.
To prevent contamination, it is advisable to re-sterilize the syringe needle between jars.
Step 6: Incubation
After inoculating your substrates, place them in a clean, warm, dark place for incubation.
During this stage, the mushroom mycelium will grow and spread throughout the substrate as it feeds.
Ideal incubation temperatures vary from species to species, but generally a room temperature of around 21-24 ° C is perfect for incubation.
Colonization times also vary depending on the species; it may take 2 to 4 weeks for complete colonization by the mycelium. If using spores, the time may be longer.
Step 7: Fruiting
By "Fruiting" we mean the process of removing your fully colonized substrate block from the jar.
First, wash your hands thoroughly and put on clean gloves. Then, open the jar and discard the layer of dried vermiculite on top.
Now, remove the blockage from the jar. An easy way to do this is to turn the jar upside down in your hand and tap the bottom lightly until the blockage comes loose.
Be careful not to drop the blocks. Although they are quite sturdy, they could break or fragment if dropped.
It's crucial to avoid cracks, as the outer layer of mycelium on your blocks protects them from any airborne contaminants. Broken or cracked blocks are more susceptible to contamination during the fruiting stage.
Once you've mined your block, you can move on to the next stage, called "Dunk and Roll."
Step 8: Dip and Roll
This step in the process is optional. You could place your blocks directly into the fruiting chamber, but the Dunk and Roll is a simple process that increases yield.
Dunking involves soaking your blocks in cold tap water for 12-24 hours. This replenishes the substrate, providing the mycelium with the moisture it needs to grow, and also stimulates fruiting, much like a good autumn rain would in nature.
When you place blocks in water, they usually float, so you'll need to weigh them down with something to ensure they're completely submerged. After submerging your blocks, you'll need to complete the Rolling phase of the process.
To prepare for this, clean a plastic container with isopropyl alcohol and add a deep layer of clean, dry vermiculite.
Some people prefer to sterilize the vermiculite in the oven first. This is only necessary if you're using an old, opened bag of vermiculite.
Remove your soaked blocks from the water and roll them in dry vermiculite until they're evenly coated on all sides. This layer of vermiculite acts as a lining and helps the blocks retain moisture.

Step 9: Fruiting
After rolling them, your blocks are ready for the fruiting stage. You'll need a fruiting chamber to provide the mycelium with optimal conditions for mushroom production.
Shotgun fruiting chambers are inexpensive, easy to make, and often used with the PF Tek method. They're simply clear plastic boxes with several small holes punched along the sides to allow for air circulation. They typically have a layer of moist perlite on the bottom to maintain high humidity levels.
You can use a wire rack, canning jar lids, or pieces of foil to lift your blocks out of the moist perlite.
Whatever you choose, clean it with alcohol before placing it in the fruiting chamber.
Make sure to leave at least 2 inches of space between your blocks to allow for good airflow and enough room for the mushrooms to grow.
Every day, you'll need to spray the mycelium with water to keep humidity levels high and periodically open the chamber to allow air to flow.
Depending on the species, you could be harvesting your first fresh gourmet mushrooms within 2 to 3 weeks.
Brown rice flour blocks typically produce 2 or 3 harvests of mushrooms. After harvesting, soak the blocks again for 12-24 hours to rehydrate them and encourage the formation of the next harvest's peaks.

Pros and Cons of PF Tek
Pros:
- Affordable and suitable for beginners
- Requires minimal equipment
- Provides a valuable learning experience
- Suitable for small-scale cultivation
Against:
- Limited to certain species of mushrooms
- Yields may be lower than other methods
- Sterilization of the substrate is necessary
Final Thoughts
Growing mushrooms at home is a rewarding experience that allows you to have a constant supply of delicious and nutritious mushrooms, with numerous health benefits.
While PF Tek is an inexpensive, reliable, and beginner-friendly technique for growing mushrooms at home, it's not the only way to get started.
Read our guide on 5 ways to grow mushrooms at home to discover other growing techniques!


